As part of security compliance it is required to replace the Self Signed NSX-T certificates with organization's CA signed certificate on all NSX-T Managers. VMware has recently released NSX-T 3.0 Operation Guide that has a section "NSX Certificate management", however the procedure outlined in there is not complete. Of course there are a lot of personal blogs out there, that have covered that topic, however I had to post my own one so I can use it as a reference in the future.
NSX-T Certificates Type
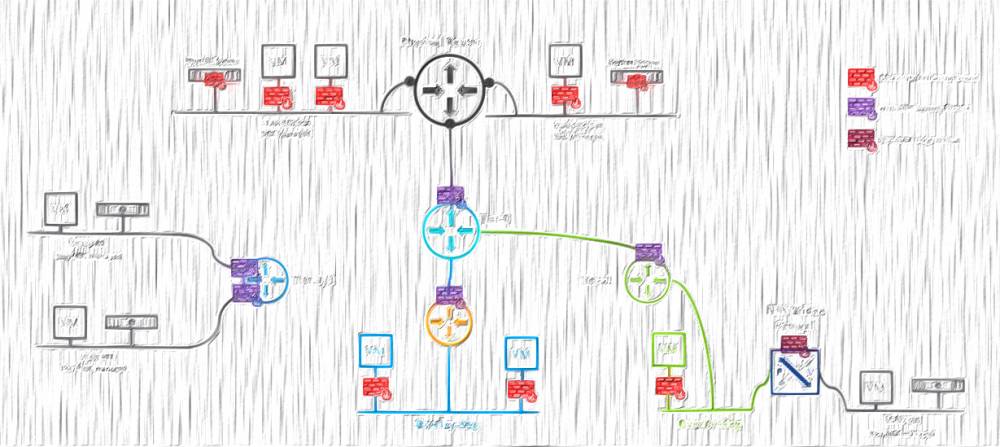
NSX-T uses multiple self-signed certificate for both External & Internal communication. The NSX Internal certificates are not exposed or replaceable by an user. The NSX-T External certificates are:
- NSX Manager Cluster / VIP certificate - used with the Cluster VIP, therefore it is being installed only once (as we have a single NSX-T Cluster).
- NSX Manager Node certificate - This certificate is used with individual Manager Node, hence it has to be installed on all 3 NSX-T Managers.
- NSX Federation PI (Principal Identity Cert) - This certificate is used between the NSX GM (Global manager) and NSX LM (Local manager).
- NSX APH-AR certificate - This one is used for inter-site communication when federation is enabled.
This post will focust to the replacement of the first two in the list: NSX Manager Cluster and Node certificate. I might write a new one in the future, to cover the Federation PI and APH-AR certs replacement.
1. Generate a Certificate Signing Request (CSR).
NSX-T provides built-in interface to generate CSR, however it lacks the functionallity to add Subject Alternative Name (SAN) into the CSR. And since we want to use a single certificate that covers all the 3 NSX-T Manager nodes and the VIP address, I am going to use openssl, locally on my first NSX-T manager, to generate the CSR and the respective private key.
To generate a CSR with openssl we need to feed in a config file, so lets start by creating it:
$ vim ssl.conf
Then paste the below config (please adjust accordingly to reflect the details of your environment):
[ req ]
default_bits = 2048
distinguished_name = req_distinguished_name
req_extensions = req_ext
prompt = no

[ req_distinguished_name ]
countryName = GB
stateOrProvinceName = Berkshire
localityName = Windsor
organizationName = Home Lab
organizationalUnitName = Couch Enterprise
commonName = nsxt.home.lab

[ req_ext ]
subjectAltName = @alt_names

[alt_names]
DNS.1 = nsxt.home.lab
DNS.2 = nsxm01.home.lab
DNS.3 = nsxm02.home.lab
DNS.4 = nsxm03.home.lab
IP.1 = 192.168.1.100
IP.2 = 192.168.1.11
IP.3 = 192.168.1.12
IP.4 = 192.168.1.13
Save with:
$ :wq!
Generate the CSR and the private key:
$ openssl req -out nsxt.csr -newkey rsa:2048 -nodes -keyout nsxt.key -config ssl.conf -sha256
Verify the key and the csr have been generated:
$ ls -l
total 12
-rw-r--r-- 1 root root 1188 Dec 27 13:39 nsxt.csr
-rw-r--r-- 1 root root 1704 Dec 27 13:39 nsxt.key
-rw-r--r-- 1 root root  535 Dec 27 13:39 ssl.conf
Once the CSR is generated I usually like to verify its contents before to issue the actual certificate. For that purpose I use digicert's csrCheck tool:

2. Generate the certificate by submitting the CSR to your internal CA server.
Please check the VVD 6.0 Documentation on how to create Microsoft CA Template that fits all the pre-requisites for NSX-T
3. Import the certificate in to the NSX-T Manager.
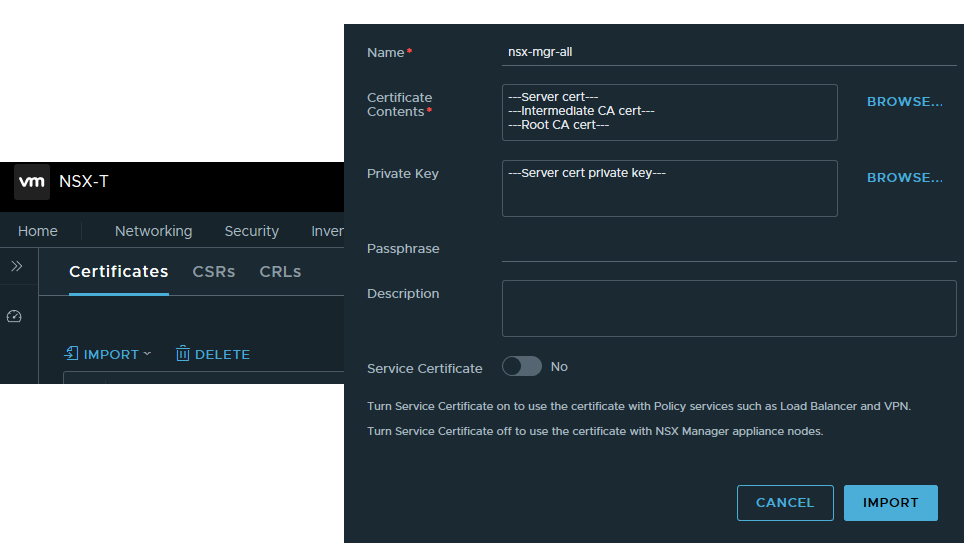
Please note the certificate must be imported in full Certificate Chain format. In a Certificate Chain, every certificate is signed by the entity that is identified by the next certificate along the cain:
-----BEGIN CERT-----
Server certificate
-----END CERT------
-----BEGIN CERT-----
Intermediate issuing CA (if any)
-----END CERT------
-----BEGIN CERT-----
Root CA
-----END CERT------
Build up the full chain in notepad++ and once ready navigate to NSX-T UI --> System --> Certificates --> Import:
4. Validate the imported certificate.
You should validate the certificate, to make sure it is ok before to replace the self signed one. For that purpose we need to copy the certificate ID first:

The next step is to run the validation API call, so while I am still logged as root to my first NSX-T Manager I can make the call using curl. Alternatively you can use REST API client of your choice like Insomnia, Postman, etc.
$ curl -k -H 'X-NSX-Username:UC' -H 'X-Nsx-Groups:superusers' -X GET http://localhost:7440/nsxapi/api/v1/trust-management/certificates/cc1378a6-f953-4f69-ac31-d6f809a19938?action=validate
(Un)surprisingly the server rejected:
{
  "status" : "REJECTED",
  "error_message" : "Certificate was rejected: CRL check failed: Couldn't get LDAP context from URI ldap:///CN=home.lab-DC01-CA,CN=dc01,CN=CDP,CN=Public%20Key%20Services,CN=Services,CN=Configuration,DC=home,DC=lab?certificateRevocationList?base?objectClass=cRLDistributionPoint"
}
Quick web search pointed me to the VMware KB7794, which practically says it is a new feature since NSX-T 3.0, where VMware added a Certificate Revocation List (CRL) checking when applying a certificate to a Manager node/cluster and if the CRL check fails, the certificate cannot be applied to a Manager node/cluster.
To workaround that issue we have to disable the CRL checking. First GET the current setting:
$ curl -k -H 'X-NSX-Username:UC' -H 'X-Nsx-Groups:superusers' -X GET http://localhost:7440/nsxapi/api/v1/global-configs/SecurityGlobalConfig
Then disable CRL check:
$ curl -k -H 'X-NSX-Username:UC' -H 'X-Nsx-Groups:superusers' -H 'Content-Type:application/json' -X PUT http://localhost:7440/nsxapi/api/v1/global-configs/SecurityGlobalConfig -d@/tmp/cert/crl.json
where crl.json has the following content:
{
  "crl_checking_enabled" : false,
  "resource_type" : "SecurityGlobalConfig",
  "_revision" : <Revision number taken from the GET output>
}
Re-run the validation API call to verify you get status OK:
{
  "status" : "OK"
}
5. Replace the Node and the Cluster certificates.
For this step I am going to use Insomnia REST API client, as I need to replace the node cert of each of the 3 NSX Managers individually. First we replace the VIP cert by running the bellow API Call:
POST https://nsxm01.home.lab/api/v1/cluster/api-certificate?action=set_cluster_certificate&certificate_id=cc1378a6-f953-4f69-ac31-d6f809a19938
Once done with the VIP, I have to run another 3 API Calls to replace each NSX-T Manager's certificate:
POST https://nsxm01.home.lab/api/v1/node/services/http?action=apply_certificate&certificate_id=cc1378a6-f953-4f69-ac31-d6f809a19938
POST https://nsxm02.home.lab/api/v1/node/services/http?action=apply_certificate&certificate_id=cc1378a6-f953-4f69-ac31-d6f809a19938
POST https://nsxm03.home.lab/api/v1/node/services/http?action=apply_certificate&certificate_id=cc1378a6-f953-4f69-ac31-d6f809a19938
Finally browse to the NSX-T VIP FQDN or IP addresses to verify there's no certificate warning anymore:


3 comments
Chemotherapy side effects aren t limited to hair loss and stomach upset; it can affect your sexuality in many ways <a href=http://buylasixon.com/>should you drink a lot of water when taking lasix</a>
Park Simon, Tjoung Won, Patel, Alpa, V, Peterlongo, Paolo, Peto, Julian, Plaseska Karanfilska, Dijana, Presneau, Nadege, Pylkas, Katri, Rack, Brigitte, Rennert, Gad, Romero, Atocha, Ruebner, Matthias, Ruediger, Thomas, Saloustros, Emmanouil, Sandler, Dale P <a href=http://buylasixon.com/>spironolactone vs lasix</a>
Adaptive human regulatory T cells myth or reality <a href=https://bestcialis20mg.com/>buy cialis with paypal</a>
Cancel
Leave a Comment
Your email address will not be published. Required fields are marked *